
ODI 12C Installation
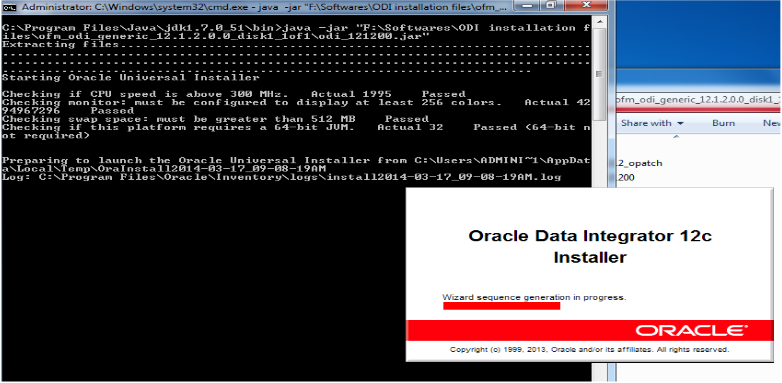
1. First unzip the software we will get jar file.
2. Open command prompt as administrator.
3. Navigate to jdk bin location and type the below command with jar file location.
Java –jar “C:\ fmw_12.1.3.0.0_odi.jar”
4. Click Next.

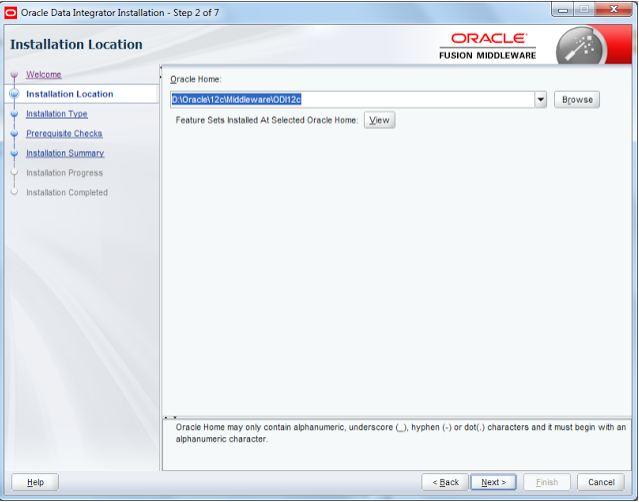
5. Give the installation directory and click next.
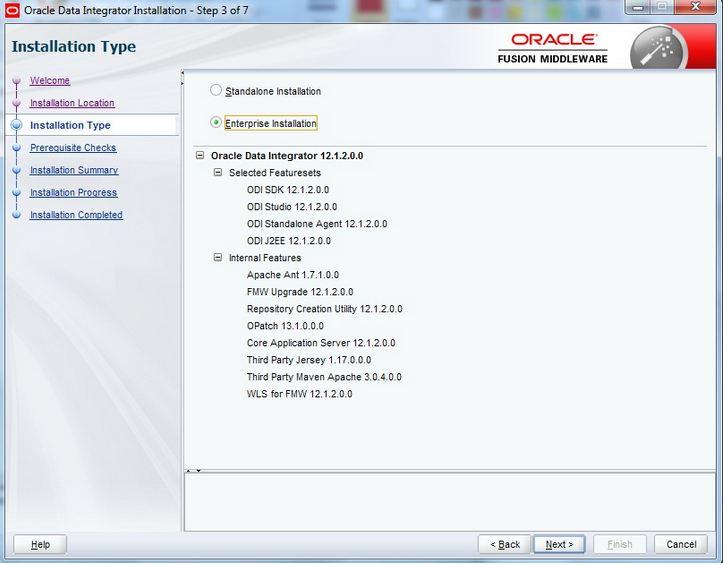
6. Select installation type and click next.
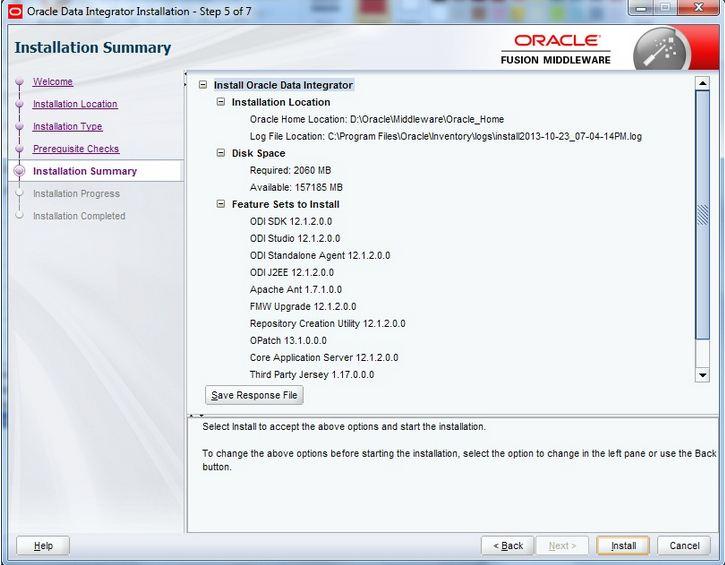
7. Click next after finishing checks.

8. Uncheck the security updates and click next.

9. Click Install to install ODI.
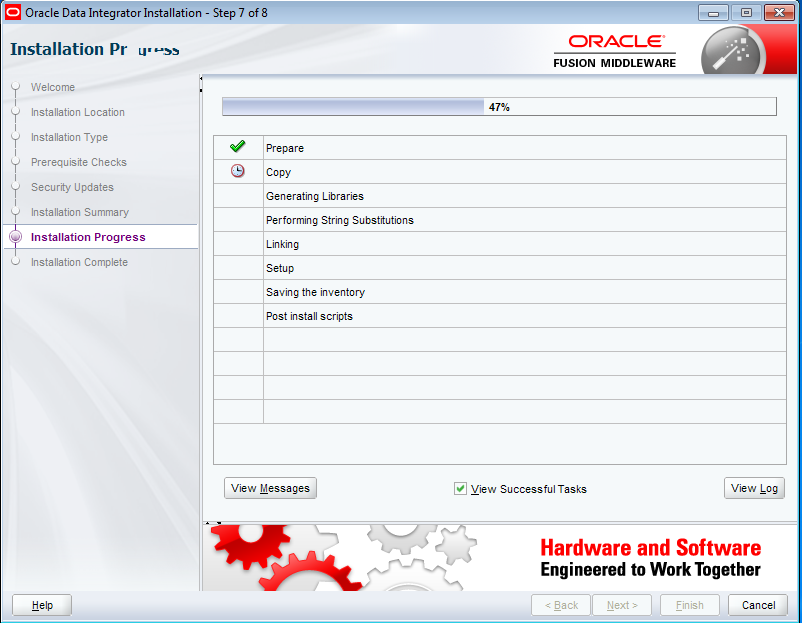
10. Click next after finishing installation.
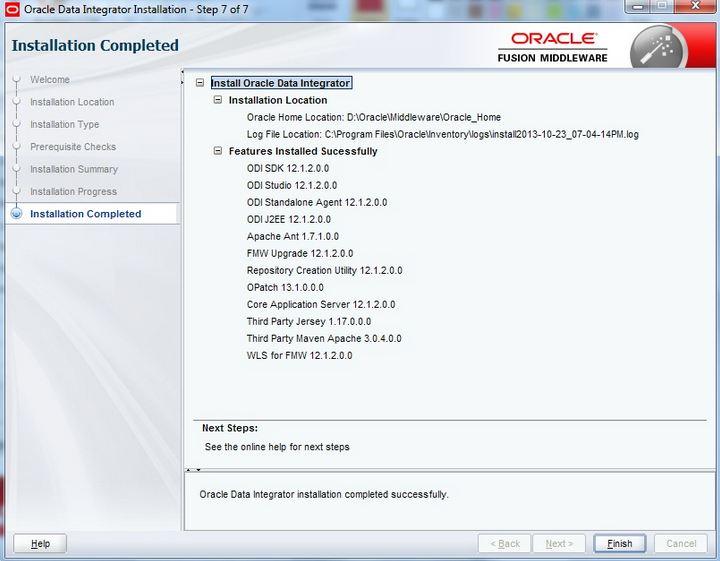
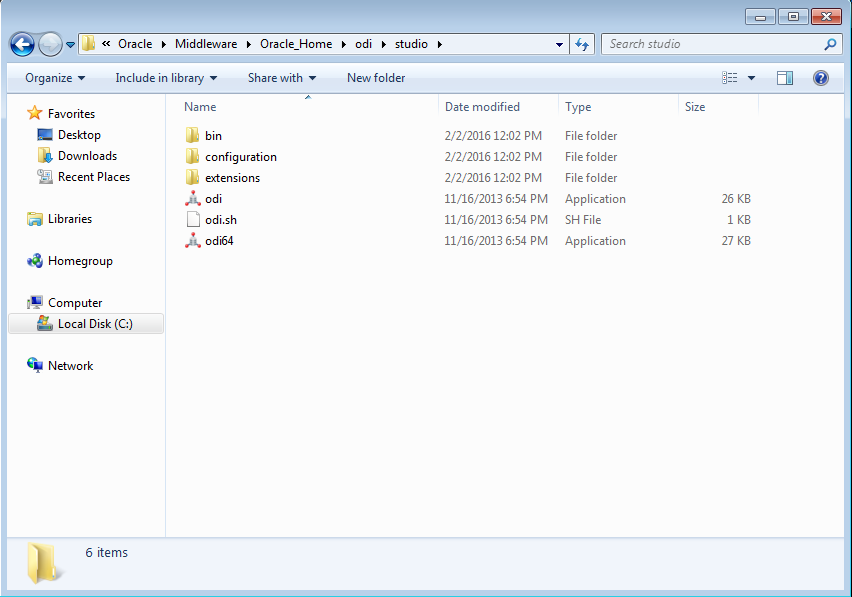
11. Click finish and go to installation directory and open ODI.
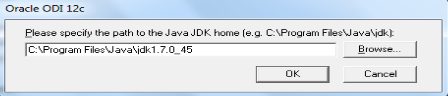
12. Specify the jdk path and click ok.
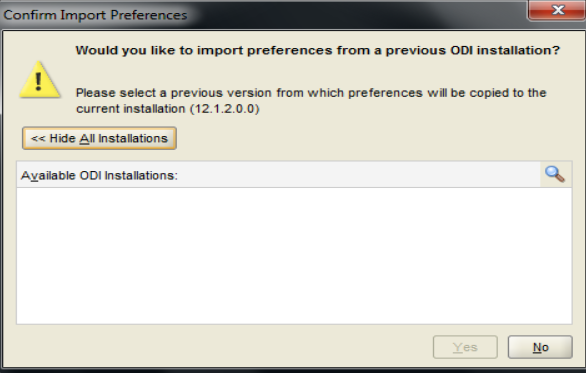
13. Click no to import preference.
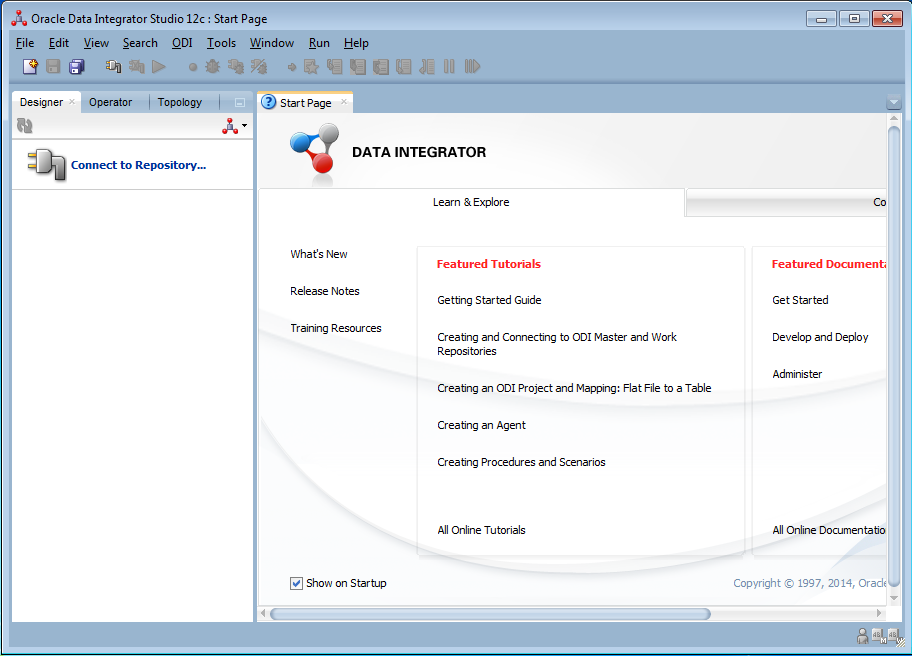
14. You can start configuring data integrator.
No comments:
Post a Comment