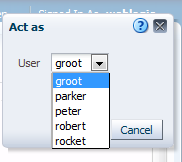
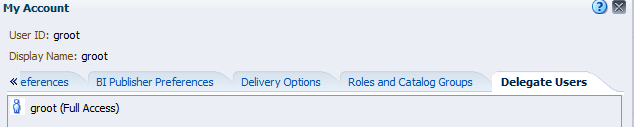
Step1 : Create table in database .
CREATE
TABLE OBEE11G_PROXY_ACTAS
(
PROXY_USER_ID VARCHAR2(30 BYTE) NOT NULL ,
PROXY_TARGET_ID VARCHAR2(30 BYTE) NOT NULL ,
PROXY_LEVEL VARCHAR2(10 BYTE) NOT NULL ,
CONSTRAINT OBEE11G_PROXY_ACTAS_PK PRIMARY KEY ( PROXY_USER_ID , PROXY_TARGET_ID )
ENABLE
) ;
TABLE OBEE11G_PROXY_ACTAS
(
PROXY_USER_ID VARCHAR2(30 BYTE) NOT NULL ,
PROXY_TARGET_ID VARCHAR2(30 BYTE) NOT NULL ,
PROXY_LEVEL VARCHAR2(10 BYTE) NOT NULL ,
CONSTRAINT OBEE11G_PROXY_ACTAS_PK PRIMARY KEY ( PROXY_USER_ID , PROXY_TARGET_ID )
ENABLE
) ;
PROXY_USER_ID : ID of the proxy user
PROXY_TARGET_ID : ID of the target user
PROXY_LEVEL : Proxy level (either full or restricted).
PROXY_TARGET_ID : ID of the target user
PROXY_LEVEL : Proxy level (either full or restricted).
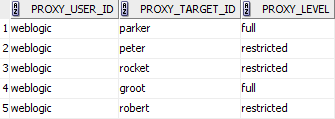
Note : Create all PROXY_TRGET_ID users in weblogic console

Step2 :(Create a Session Variables for Proxy Functionality)
2.1 : Import OBEE11G_PROXY_ACTAS table into physical layer.
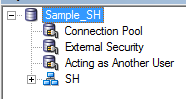
2.2: There are two system session variables along with their associated initialization blocks that you create to authenticate proxy users:
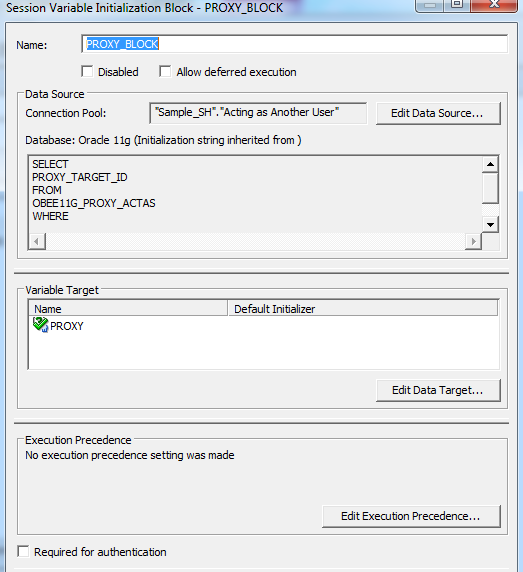
PROXY :
SELECT
PROXY_TARGET_ID
FROM
OBEE11G_PROXY_ACTAS
WHERE
UPPER(PROXY_USER_ID) = UPPER( ‘:USER’)
AND UPPER(PROXY_TARGET_ID) = UPPER(‘VALUEOF(NQ_SESSION.RUNAS)’)
PROXY_TARGET_ID
FROM
OBEE11G_PROXY_ACTAS
WHERE
UPPER(PROXY_USER_ID) = UPPER( ‘:USER’)
AND UPPER(PROXY_TARGET_ID) = UPPER(‘VALUEOF(NQ_SESSION.RUNAS)’)
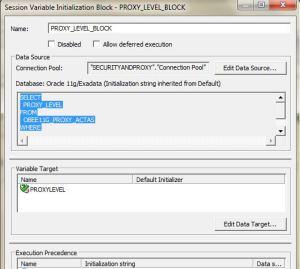
PROXYLEVEL :
SELECT
PROXY_LEVEL
FROM
OBEE11G_PROXY_ACTAS
WHERE
UPPER(PROXY_USER_ID) = UPPER(‘:USER’)
AND UPPER(PROXY_TARGET_ID) = UPPER(‘VALUEOF(NQ_SESSION.RUNAS)’)
PROXY_LEVEL
FROM
OBEE11G_PROXY_ACTAS
WHERE
UPPER(PROXY_USER_ID) = UPPER(‘:USER’)
AND UPPER(PROXY_TARGET_ID) = UPPER(‘VALUEOF(NQ_SESSION.RUNAS)’)
Step3:(Creating a Custom Message Template for Proxy Functionality)
In this step create “LogonParamSQLTemplate.xml” file and place it under “<Middleware Home>\Oracle_BI1\bifoundation\web\msgdb\customMessages”
Note : If you dont find the folder ‘customMessages’ , then create create folder with the name ‘customMessages’ and place the ‘LogonParamSQLTemplate.xml’ file .

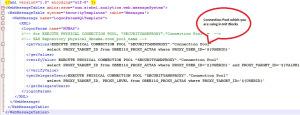
In my case the content of ‘LogonParamSQLTemplate.xml is’
<?xml version=”1.0″ encoding=”utf-8″ ?>
<WebMessageTables xmlns:sawm=”com.siebel.analytics.web.messageSystem”>
<WebMessageTable system=”SecurityTemplates” table=”Messages”>
<WebMessage name=”LogonParamSQLTemplate”>
<XML>
<logonParam name=”RUNAS”>
<!– for EXECUTE PHYSICAL CONNECTION POOL, “SECURITYANDPROXY”.”Connection Pool” = –>
<!– SAS Repository physical_dbname.conn_pool_name –>
<getValues>EXECUTE PHYSICAL CONNECTION POOL “SECURITYANDPROXY”.”Connection Pool”
select PROXY_TARGET_ID from OBEE11G_PROXY_ACTAS where PROXY_USER_ID=’@{USERID}’
</getValues>
<verifyValue> EXECUTE PHYSICAL CONNECTION POOL “SECURITYANDPROXY”.”Connection Pool”
select PROXY_TARGET_ID from OBEE11G_PROXY_ACTAS where PROXY_USER_ID=’@{USERID}’ and PROXY_TARGET_ID=’@{VALUE}’
</verifyValue>
<getDelegateUsers>EXECUTE PHYSICAL CONNECTION POOL “SECURITYANDPROXY”.”Connection Pool”
select PROXY_TARGET_ID, PROXY_LEVEL from OBEE11G_PROXY_ACTAS where PROXY_TARGET_ID=’@{USERID}’
</getDelegateUsers>
</logonParam>
</XML>
</WebMessage>
</WebMessageTable>
</WebMessageTables>
<WebMessageTables xmlns:sawm=”com.siebel.analytics.web.messageSystem”>
<WebMessageTable system=”SecurityTemplates” table=”Messages”>
<WebMessage name=”LogonParamSQLTemplate”>
<XML>
<logonParam name=”RUNAS”>
<!– for EXECUTE PHYSICAL CONNECTION POOL, “SECURITYANDPROXY”.”Connection Pool” = –>
<!– SAS Repository physical_dbname.conn_pool_name –>
<getValues>EXECUTE PHYSICAL CONNECTION POOL “SECURITYANDPROXY”.”Connection Pool”
select PROXY_TARGET_ID from OBEE11G_PROXY_ACTAS where PROXY_USER_ID=’@{USERID}’
</getValues>
<verifyValue> EXECUTE PHYSICAL CONNECTION POOL “SECURITYANDPROXY”.”Connection Pool”
select PROXY_TARGET_ID from OBEE11G_PROXY_ACTAS where PROXY_USER_ID=’@{USERID}’ and PROXY_TARGET_ID=’@{VALUE}’
</verifyValue>
<getDelegateUsers>EXECUTE PHYSICAL CONNECTION POOL “SECURITYANDPROXY”.”Connection Pool”
select PROXY_TARGET_ID, PROXY_LEVEL from OBEE11G_PROXY_ACTAS where PROXY_TARGET_ID=’@{USERID}’
</getDelegateUsers>
</logonParam>
</XML>
</WebMessage>
</WebMessageTable>
</WebMessageTables>
Step4:(Modifying the instanceconfig.xml File for Proxy Functionality)
You can modify the Oracle BI Presentation Services configuration file (instanceconfig.xml) to specify the following information for proxy functionality:
For example between the <ServerInstance> node, you can insert:
<LogonParam>
<TemplateMessageName>LogonParamSQLTemplate</TemplateMessageName>
<MaxValues>100</MaxValues>
</LogonParam>
<TemplateMessageName>LogonParamSQLTemplate</TemplateMessageName>
<MaxValues>100</MaxValues>
</LogonParam>
The name that you specify in the <TemplateMessageName> element must match the name that you specify in the <WebMessage> element in the custom message file.

Restart Services
Step5: (Assigning the privilege and restarting the BI Presentation Service)
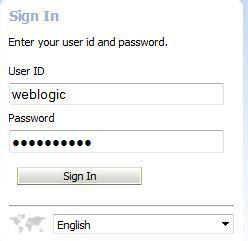
Login to Presentation services http://localhost:9704/analytics
5.2:Click in Administration

Click on Manage Privileges
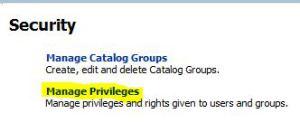
Give Act As Proxy permission to the user ‘weblogic’

Now the user should be able to act as the users (PROXY_TARGET_ID) .