Monday, August 24, 2015

PHP Email Verification Script

Hi all, Email verification has become most common procedure to avoid spam users. Here is the simple script which makes you guys clear in actual process work flow.

1.Database
Create a sample database users table contains four columns uid, email, password, activation and status.                                                                               

CREATE TABLE IF NOT EXISTS `users` (
`uidint(11) NOT NULL AUTO_INCREMENT,
`emailvarchar(300) NOT NULL UNIQUE,
`passwordvarchar(300) NOT NULL,
`activationvarchar(300) NOT NULL UNIQUE,
`statusenum('0','1') NOT NULL DEFAULT '0',
PRIMARY KEY (`uid`)
)


2.HTML Code

Create a simple HTMl code containing Email and Password Login form


<form action=" " method="post">
<label>Email</label>
<input type="text" name="email" class="input" autocomplete="off"/>
<label>Password </label>
<input type="password" name="password" class="input" autocomplete="off"/><br/>
<input type="submit" class="button" value="Registration" />
<span class='msg'><?php echo $msg; ?></span>
</form>

3.db.php

Create Database configuration file, modify username, password, database and base url values. 


<?php
define('DB_SERVER', 'localhost');
define('DB_USERNAME', 'username');
define('DB_PASSWORD', 'password');
define('DB_DATABASE', 'database');
$connection = @mysqli_connect(DB_SERVER,DB_USERNAME,DB_PASSWORD,DB_DATABASE);
$base_url='http://www.youwebsite.com/email_activation/';
?>

4.Index.php

Create PHP code, storing user registration values into users table. Here activation code generation using MD5 encryption. 
<?php
include 'db.php';
$msg='';
if(!empty($_POST['email']) && isset($_POST['email']) && !empty($_POST['password']) &&  isset($_POST['password']) )
{
// username and password sent from form
$email=mysqli_real_escape_string($connection,$_POST['email']);
$password=mysqli_real_escape_string($connection,$_POST['password']);
// regular expression for email check
$regex = '/^[_a-z0-9-]+(\.[_a-z0-9-]+)*@[a-z0-9-]+(\.[a-z0-9-]+)*(\.[a-z]{2,4})$/';
if(preg_match($regex, $email))

$password=md5($password); // encrypted password
$activation=md5($email.time()); // encrypted email+timestamp
$count=mysqli_query($connection,"SELECT uid FROM users WHERE email='$email'");
// email check
if(mysqli_num_rows($count) < 1)
{
mysqli_query($connection,"INSERT INTO users(email,password,activation) VALUES('$email','$password','$activation')");
// sending email
include 'smtp/Send_Mail.php';
$to=$email;
$subject="Email verification";
$body='Hi, <br/> <br/> We need to make sure you are human. Please verify your email and get started using your Website account. <br/> <br/> <a href="'.$base_url.'activation/'.$activation.'">'.$base_url.'activation/'.$activation.'</a>';
Send_Mail($to,$subject,$body);
$msg= "Registration successful, please activate email.";
}
else
{
$msg= 'The email is already taken, please try new.';
}
}
else
{
$msg = 'The email you have entered is invalid, please try again.'; 
}
}
?>

5.Send_Mail.php

Sending email function, just modify SMTP host, username and password. Here you can use GMail SMTP details for testing click here to see GMail SMTP article. 


<?php
function Send_Mail($to,$subject,$body)
{
require 'class.phpmailer.php';
$from       = "from@yourwebsite.com";
$mail       = new PHPMailer();
$mail->IsSMTP(true);            // use SMTP
$mail->IsHTML(true);
$mail->SMTPAuth   = true;                  // enable SMTP authentication
$mail->Host       = "tls://smtp.yourwebsite.com"; // SMTP host
$mail->Port       =  465;                    // set the SMTP port
$mail->Username   = "SMTP_Username";  // SMTP  username
$mail->Password   = "SMTP_Password";  // SMTP password
$mail->SetFrom($from, 'From Name');
$mail->AddReplyTo($from,'From Name');
$mail->Subject    = $subject;
$mail->MsgHTML($body);
$address = $to;
$mail->AddAddress($address, $to);
$mail->Send(); 
}
?>

6.activation.php
Contains PHP code, here based on activations code user status updating from 0 to1


<?php
include 'db.php';
$msg='';
if(!empty($_GET['code']) && isset($_GET['code']))
{
$code=mysqli_real_escape_string($connection,$_GET['code']);
$c=mysqli_query($connection,"SELECT uid FROM users WHERE activation='$code'");

if(mysqli_num_rows($c) > 0)
{
$count=mysqli_query($connection,"SELECT uid FROM users WHERE activation='$code' and status='0'");

if(mysqli_num_rows($count) == 1)
{
mysqli_query($connection,"UPDATE users SET status='1' WHERE activation='$code'");
$msg="Your account is activated";
}
else
{
$msg ="Your account is already active, no need to activate again";
}

}
else
{
$msg ="Wrong activation code.";
}

}
?>
//HTML Part
<?php echo $msg; ?>

7.Email Verification
An email verification Link will be sent to the user emailid.
8) .htaccess

URL redirection script it turns
http://yourwebsite_name.com/activation.php?code=ACTIVATION_CODE
to
http:// yourwebsite_name.com/activation/ACTIVATION_CODE
RewriteEngine On

RewriteRule ^activation/([a-zA-Z0-9_-]+)$ activation.php?code=$1
RewriteRule ^activation/([a-zA-Z0-9_-]+)/$ activation.php?code=$1

9.CSS code


body
{
font-family: "Helvetica",Arial,sans-serif;
font-weight: 500;
color:#333;
}
label
{
width:100px;
display:block;
font-weight:bold;
color:#666666;
}
#main
{
margin:0 auto;
width:800px;
}
.input
{
padding:10px;
font-size:14px;
border:1px solid #999999;
width:200px;
margin-bottom:10px;
}
.button {
padding:10px;
background-color: #5fcf80 !important;
border-color: #3ac162 !important;
}
.msg
{
font-size:11px;
color:#666;
padding:10px;
}


Tuesday, August 11, 2015

Setting up User Proxies in OBIEE 11g

Step1 :  Create table in database .
CREATE
TABLE OBEE11G_PROXY_ACTAS
(
PROXY_USER_ID   VARCHAR2(30 BYTE) NOT NULL ,
PROXY_TARGET_ID VARCHAR2(30 BYTE) NOT NULL ,
PROXY_LEVEL     VARCHAR2(10 BYTE) NOT NULL ,
CONSTRAINT OBEE11G_PROXY_ACTAS_PK PRIMARY KEY ( PROXY_USER_ID , PROXY_TARGET_ID )
ENABLE
) ;
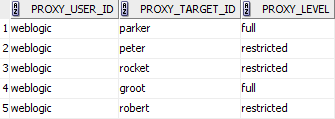
PROXY_USER_ID   : ID of the proxy user
PROXY_TARGET_ID : ID of the target user
PROXY_LEVEL     : Proxy level (either full or restricted).
Note : Create all PROXY_TRGET_ID users in weblogic console
Step2 :(Create a Session Variables for Proxy Functionality)
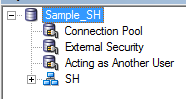
2.1 : Import OBEE11G_PROXY_ACTAS table into physical layer.

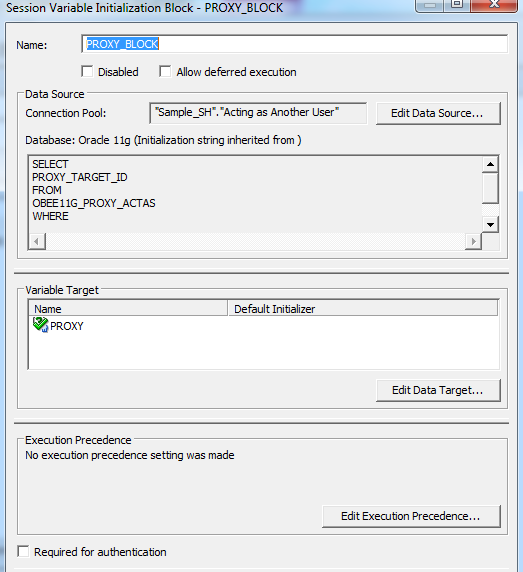
2.2: There are two system session variables along with their associated initialization blocks that you create to authenticate proxy users:
PROXY :
SELECT
PROXY_TARGET_ID
FROM
OBEE11G_PROXY_ACTAS
WHERE
UPPER(PROXY_USER_ID)     = UPPER( ‘:USER’)
AND UPPER(PROXY_TARGET_ID) = UPPER(‘VALUEOF(NQ_SESSION.RUNAS)’)
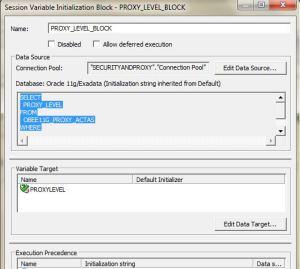
PROXYLEVEL :
SELECT
PROXY_LEVEL
FROM
OBEE11G_PROXY_ACTAS
WHERE
UPPER(PROXY_USER_ID)     = UPPER(‘:USER’)
AND UPPER(PROXY_TARGET_ID) = UPPER(‘VALUEOF(NQ_SESSION.RUNAS)’)
http://prasadmadhasi.files.wordpress.com/2012/02/4.jpg?w=300&h=269
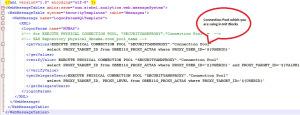
Step3:(Creating a Custom Message Template for Proxy Functionality)
In this step create “LogonParamSQLTemplate.xml” file and place it under “<Middleware Home>\Oracle_BI1\bifoundation\web\msgdb\customMessages”
Note : If you dont find the folder ‘customMessages’ , then create create folder with the name ‘customMessages’ and place the ‘LogonParamSQLTemplate.xml’ file .
In my case the content of ‘LogonParamSQLTemplate.xml is’
<?xml version=”1.0″ encoding=”utf-8″ ?>
<WebMessageTables xmlns:sawm=”com.siebel.analytics.web.messageSystem”>
<WebMessageTable system=”SecurityTemplates” table=”Messages”>
<WebMessage name=”LogonParamSQLTemplate”>
<XML>
<logonParam name=”RUNAS”>
<!– for EXECUTE PHYSICAL CONNECTION POOL, “SECURITYANDPROXY”.”Connection Pool” =  –>
<!– SAS Repository physical_dbname.conn_pool_name –>
<getValues>EXECUTE PHYSICAL CONNECTION POOL “SECURITYANDPROXY”.”Connection Pool”
select PROXY_TARGET_ID from OBEE11G_PROXY_ACTAS where PROXY_USER_ID=’@{USERID}’
</getValues>
<verifyValue> EXECUTE PHYSICAL CONNECTION POOL “SECURITYANDPROXY”.”Connection Pool”
select PROXY_TARGET_ID from OBEE11G_PROXY_ACTAS where PROXY_USER_ID=’@{USERID}’ and PROXY_TARGET_ID=’@{VALUE}’
</verifyValue>
<getDelegateUsers>EXECUTE PHYSICAL CONNECTION POOL “SECURITYANDPROXY”.”Connection Pool”
select PROXY_TARGET_ID, PROXY_LEVEL from OBEE11G_PROXY_ACTAS where PROXY_TARGET_ID=’@{USERID}’
</getDelegateUsers>
</logonParam>
</XML>
</WebMessage>
</WebMessageTable>
</WebMessageTables>
http://prasadmadhasi.files.wordpress.com/2012/02/5.jpg?w=300&h=114
Step4:(Modifying the instanceconfig.xml File for Proxy Functionality)
You can modify the Oracle BI Presentation Services configuration file (instanceconfig.xml) to specify the following information for proxy functionality:
For example between the <ServerInstance> node, you can insert:
<LogonParam>
<TemplateMessageName>LogonParamSQLTemplate</TemplateMessageName>
<MaxValues>100</MaxValues>
</LogonParam>
The name that you specify in the <TemplateMessageName> element must match the name that you specify in the <WebMessage> element in the custom message file.
http://prasadmadhasi.files.wordpress.com/2012/02/7.jpg?w=300&h=54
Restart Services
Step5: (Assigning the privilege and restarting the BI Presentation Service)
Login to Presentation services http://localhost:9704/analytics
http://prasadmadhasi.files.wordpress.com/2012/02/8.jpg?w=530
5.2:Click in Administration
http://prasadmadhasi.files.wordpress.com/2012/02/9.jpg?w=530
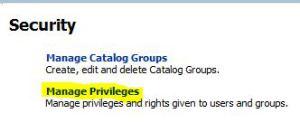
Click on Manage Privileges
http://prasadmadhasi.files.wordpress.com/2012/02/101.jpg?w=300&h=131
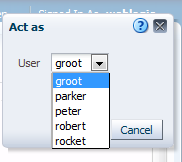
Give Act As Proxy permission to the user ‘weblogic’
http://prasadmadhasi.files.wordpress.com/2012/02/111.jpg?w=300&h=15
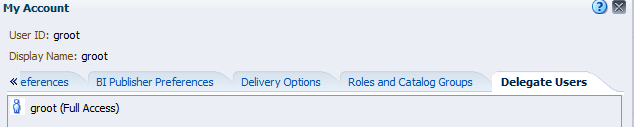
Now the user should be able to act as the users (PROXY_TARGET_ID) .

Monday, August 10, 2015

Informatica Installation through PUTTY for Linux Server


 ./install.bin                                                -- bash =
(run or install command ./ )                    step1
Preparing to install...
Extracting the JRE from the installer archive...
Unpacking the JRE...
Extracting the installation resources from the installer archive...
Configuring the installer for this system's environment...

Launching installer...

Preparing SILENT Mode Installation...

=3D=3D=3D=3D=3D=3D=3D=3D=3D=3D=3D=3D=3D=3D=3D=3D=3D=3D=3D=3D=3D=3D=3D=3D=3D=
=3D=3D=3D=3D
Informatica 9.0.1 Services HotFix2               (created with =
InstallAnywhere)
-------------------------------------------------------------------------=
------


***************************************************************
Installation Type
**************************************************************
[ Type 'back' to go to the previous panel or 'quit' to cancel the =
installation at any time. ]


Copyright (c) 1998-2010 Informatica Corporation. All rights reserved.
This software is protected by U.S. patent numbers 5,794,246; 6,014,670;
6,016,501; 6,029,178; 6,032,158; 6,035,307; 6,044,374; 6,092,086;
6,208,990;6,339,775;6,640,226; 6,789,096; 6,820,077; 6,823,373;
6,850,947; 6,895,471;7,117,215;7,162,643; 7,254,590; 7,281,001;
and 7,421,458; international patents and other patents pending.


Select installation or upgrade:
    * 1->Install Informatica 9.0.1 with HotFix 2.
Select this option to perform a full installation of Informatica 9.0.1 =
HotFix 2.
      2->Upgrade to Informatica 9.0.1 with HotFix 2.
Select this option to upgrade previous versions of Informatica products =
to Informatica 9.0.1 HotFix 2.
:1                                                                       =
                                                                         =
                                                          -- step2       =
                                                                         =
                                                      =20


***************************************************************
Installation Pre-Requisites
**************************************************************
[ Type 'back' to go to the previous panel or 'quit' to cancel the =
installation at any time. ]

Verify the installation pre-requisites and complete the
pre-installation tasks before you continue.

Disk Space Requirement: 4 GB

Memory Requirement(RAM): 4 GB

Databases
- Oracle, Microsoft SQL Server, or IBM DB2
- Database user account must have permission to create and drop tables
and views and insert, update, and delete data

Pre-installation Tasks
- Verify that you have a valid license key.
- Set up a database user account for the domain configuration.
- Determine the port numbers to use for the node and domain services.
Press <Enter> to continue ...                                            =
                                                                         =
                                                 -- step3                =
      =20


***************************************************************
License Key
**************************************************************
[ Type 'back' to go to the previous panel or 'quit' to cancel the =
installation at any time. ]


Enter a license key file (default :- /home/etldev/license.key) =
:/u04/DAC+Infa_9.0/Informatica/Oracle_All_OS_Prod.key


***************************************************************
Installation Directory
**************************************************************
[ Type 'back' to go to the previous panel or 'quit' to cancel the =
installation at any time. ]


Enter the installation directory (default :- =
/home/etldev/Informatica/9.0.1) :/u02/Informatica                        =
                                     -- step4


***************************************************************
Pre-Installation Summary
**************************************************************
[ Type 'back' to go to the previous panel or 'quit' to cancel the =
installation at any time. ]


Product Name     :      Informatica 9.0.1 HotFix 2

Installation Type        :      Fresh Installation

Installation Directory   :      /u02/Informatica

Disk Space Requirements

Required Disk Space      :      2,815 MB

Available Disk Space     :      182,077 MB

Press <Enter> to continue ...


***************************************************************
Installing
**************************************************************


 =
[=3D=3D=3D=3D=3D=3D=3D=3D=3D=3D=3D=3D=3D=3D=3D=3D=3D=3D|=3D=3D=3D=3D=3D=3D=
=3D=3D=3D=3D=3D=3D=3D=3D=3D=3D=3D=3D|=3D=3D=3D=3D=3D=3D=3D=3D=3D=3D=3D=3D=
=3D=3D=3D=3D=3D=3D|=3D=3D=3D=3D=3D=3D=3D=3D=3D=3D=3D=3D=3D=3D=3D=3D=3D=3D=
]
 =
[=3D=3D=3D=3D=3D=3D=3D=3D=3D=3D=3D=3D=3D=3D=3D=3D=3D=3D|=3D=3D=3D=3D=3D=3D=
=3D=3D=3D=3D=3D=3D=3D=3D=3D=3D=3D=3D|=3D=3D=3D=3D=3D=3D=3D=3D=3D=3D=3D=3D=
=3D=3D=3D=3D=3D=3D|=3D=3D=3D=3D=3D=3D=3D=3D=3D=3D=3D=3D=3D=3D=3D=3D=3D=3D=
]
 =
[=3D=3D=3D=3D=3D=3D=3D=3D=3D=3D=3D=3D=3D=3D=3D=3D=3D=3D|=3D=3D=3D=3D=3D=3D=
=3D=3D=3D=3D=3D=3D=3D=3D=3D=3D=3D=3D|=3D=3D=3D=3D=3D=3D=3D=3D=3D=3D=3D=3D=
=3D=3D=3D=3D=3D=3D|=3D=3D=3D=3D=3D=3D=3D=3D=3D=3D=3D=3D=3D=3D=3D=3D=3D=3D=
]
 =
[=3D=3D=3D=3D=3D=3D=3D=3D=3D=3D=3D=3D=3D=3D=3D=3D=3D=3D|=3D=3D=3D=3D=3D=3D=
=3D=3D=3D=3D=3D=3D=3D=3D=3D=3D=3D=3D|=3D=3D=3D=3D=3D=3D=3D=3D=3D=3D=3D=3D=
=3D=3D=3D=3D=3D=3D|=3D=3D=3D=3D=3D=3D=3D=3D=3D=3D=3D=3D=3D=3D=3D=3D=3D=3D=
]


=3D=3D=3D=3D=3D=3D=3D=3D=3D=3D=3D=3D=3D=3D=3D=3D=3D=3D=3D=3D=3D=3D=3D=3D=3D=
=3D=3D=3D=3D
Configuring Installation...
---------------------------

 =
[=3D=3D=3D=3D=3D=3D=3D=3D=3D=3D=3D=3D=3D=3D=3D=3D=3D=3D|=3D=3D=3D=3D=3D=3D=
=3D=3D=3D=3D=3D=3D=3D=3D=3D=3D=3D=3D|=3D=3D=3D=3D=3D=3D=3D=3D=3D=3D=3D=3D=
=3D=3D=3D=3D=3D=3D|=3D=3D=3D=3D=3D=3D=3D=3D=3D=3D=3D=3D=3D=3D=3D=3D=3D=3D=
]
 =
[------------------|------------------|------------------|---------------=
---]


***************************************************************
Domain Selection
**************************************************************
[ Type 'back' to go to the previous panel or 'quit' to cancel the =
installation at any time. ]

    * 1->Create a domain
      2->Join a Domain
:1                                                                       =
                                                                         =
                     -- step5                  =20
    * 1->Enable HTTPS for Informatica Administrator
      2->Disable HTTPS
:1                                                                       =
                                                                         =
                     -- step6                 =20

Port: (default :- 8443) :8443
    * 1->Use a keystore file generated by the installer
      2->Use an existing keystore file
:1                                                                       =
                                                                         =
                    -- step7        =20


***************************************************************
Domain Configuration Database
**************************************************************
[ Type 'back' to go to the previous panel or 'quit' to cancel the =
installation at any time. ]


Configure the database for the domain configuration repository:

Database type:
    * 1->Oracle
      2->SQLServer
      3->DB2
:1                                                                       =
                                                                         =
                    -- step8

Database user ID: (default :- admin) :Administrator                      =
                                                                 -- =
step9     =20

User password: (default :- admin) :Administrator                         =
                                                                  -- =
step10     =20

Configure Database connection
    * 1->JDBC URL
      2->Custom JDBC Connection String
:1                                                                       =
                                                                         =
                     -- step11    =20

Database address: (default :- host_name:port_no) :localhost:1521         =
                             -- step12=20

Database service name: (default :- ServiceName) :orcl                    =
                                   -- step13

Configure JDBC parameters
    * 1->Yes
      2->No
:2                                                                       =
                                                                         =
                           -- step14  =20


***************************************************************
Domain and Node Configuration
**************************************************************
[ Type 'back' to go to the previous panel or 'quit' to cancel the =
installation at any time. ]


Enter the information for the Informatica domain to create.

Domain name: (default :- Domain_sss) :Domain_sss                         =
                                    -- step15

Node host name: (default :- sss) :sss                                     =
                                              -- step16

Node name: (default :- node01_sss) :node01_sss                           =
                                    -- step17

Node port number: (default :- 6005) :6005                                =
                                                                         =
-- step18

Domain user name: (default :- Administrator) :Administrator              =
                                                             -- step19

Domain password: (default :- Administrator) :Administrator               =
                                                              -- step20
 =20
Confirm password: (default :- Administrator) :Administrator              =
                                                               -- step21

Display advanced port configuration page
    * 1->No
      2->Yes
:1                                                                       =
                                                                         =
                         -- step22
=20

***************************************************************
Post-Installation Summary
**************************************************************
Installation Status: SUCCESS

The Informatica 9.0.1 HotFix 2 installation is complete.

For more information, see the debug log file:
/u02/Informatica/Informatica_9.0.1_Services_HotFix2.log

Installation Type :Fresh Installation


Informatica Administrator Home Page:
http://sss:6007

Product Name:  Informatica 9.0.1 HotFix 2


Installation Complete.

[etldev@usuv-etl-dev Server]$