
Download MySQL installer file
- You will be asked to register or sign in at your account. Registering has its benefits, but if you are in a hurry, simply click on the No thanks, just start my downloads! Link.
- A list of sites from where you can download the MySQL file will be displayed.
- Choose a ‘mirror’ which is closest to your geographical location to get the file fast. FYI, there is no problem in choosing a site located in Europe even though you are in the United States
Setting up MySQL
- Move to the folder to which the MSI file was downloaded and double-click on it to start MySQL installation – click “Run” when prompted.

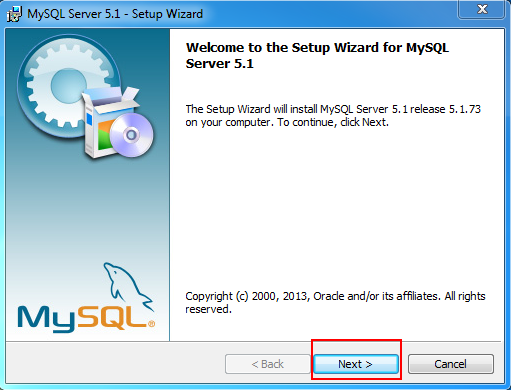
- Click “Next” button in the introductory window
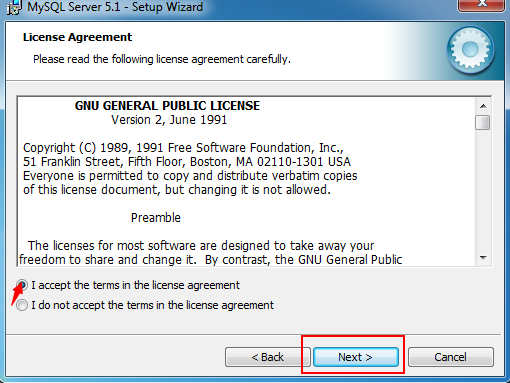
- Accept the terms in the License Agreement by checking the box and hit “Next”
- In the following screen, select Custom installation which will allow you to specify the folder to which MySQL will be installed. FYI, choosing Typical will put MySQL deep down in the “Program Files” folder.

- Click the “Browse” button

- And enter C:\MySQL in the Folder name field. Hit “OK” when done.
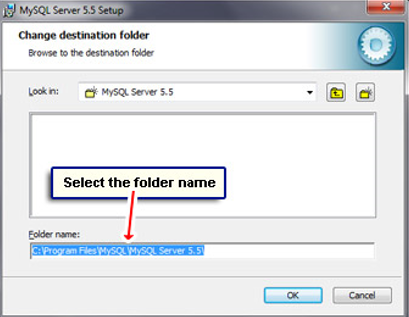

- The installer will change the MySQL installation folder to the one specified by you – C:\MySQL

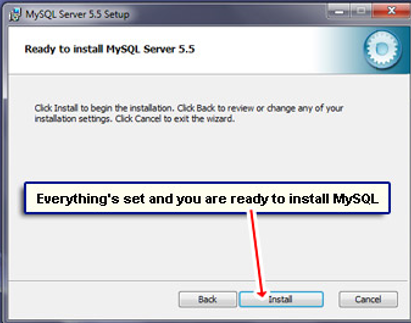
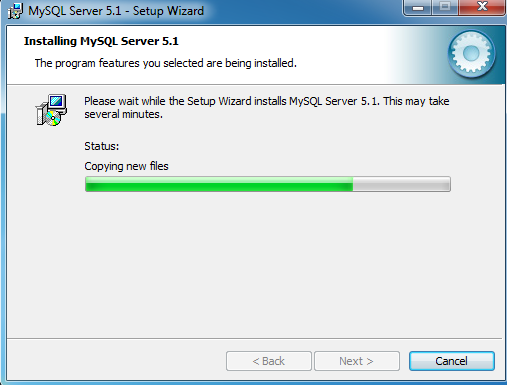
- You are now ready to install MySQL on Windows 7 operating system. Click “Install”
- It would take some time for the progress bar to start moving… be patient.


- You may also get messages along the way – simply click on “Next” to proceed.

- When the process finishes, you’ll get to see the final screen. Congratulations – MySQL has been installed on your computer. You are now prompted to Configure the MySQL server; click “Finish.

Configuring a MySQL instance
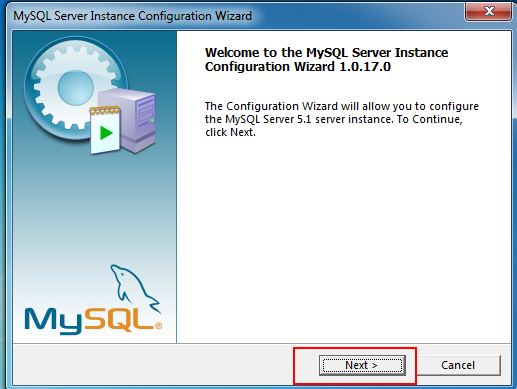
- The MySQL Instance Configuration Wizard will now launch click “Next” to proceed. Please note that you cannot use MySQL until an instance has been configured, so these steps are quite important.
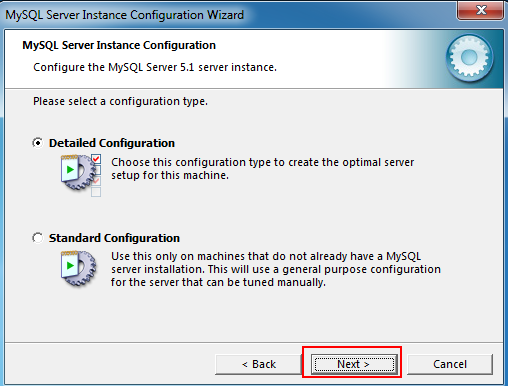
- Select “Detailed Configuration” option
- Choose “Developer Machine”

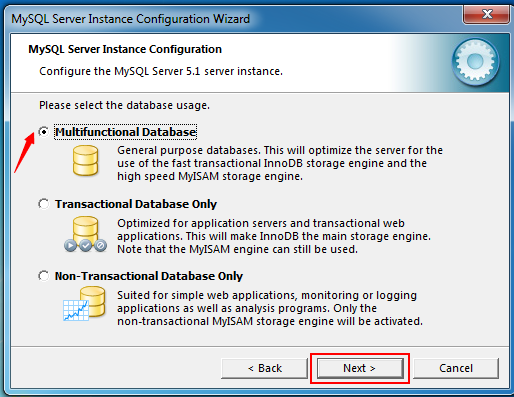
- I suggest going ahead with “Multifunctional Database” unless you know what you are doing.
- In the following screen, don’t mess with the default values and click “Next”.

- The same goes for the subsequent screen; click “Next”

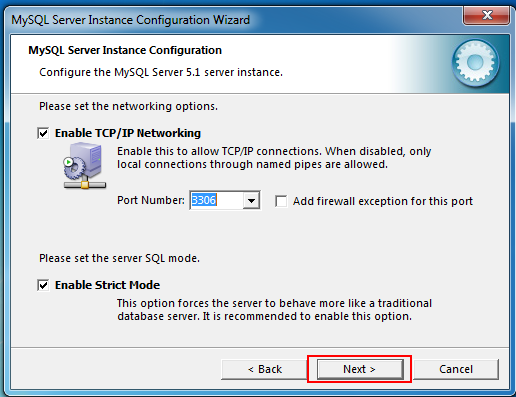
- For the networking options configuration, put a check mark in front of “Enable Strict Mode” if it’s not there
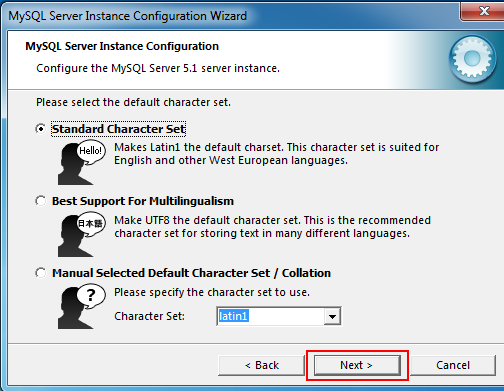
- Move ahead with the “Standard Character Set”
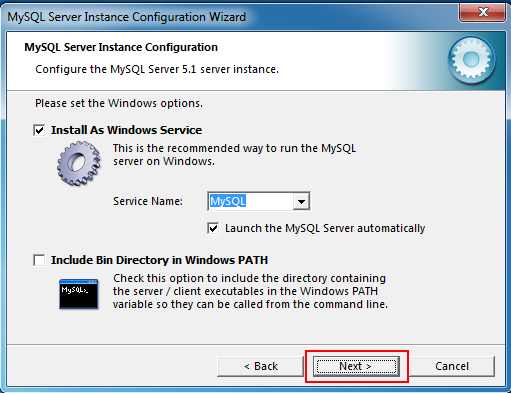
- Yes, it’s recommended to install MySQL as a Windows service and have the system include the MySQL bin directory in the Windows PATH variable.
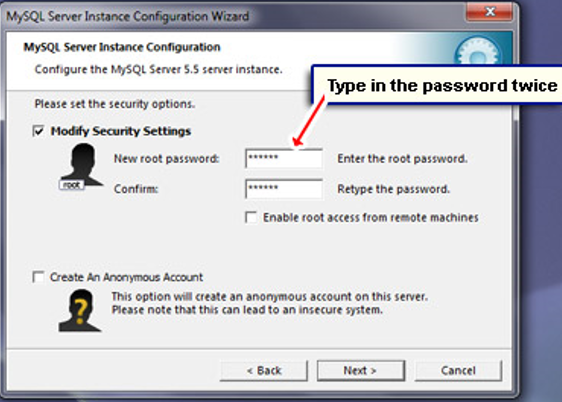
- The password for the MySQL server instance has to be typed in twice as below. Remember to keep a note of it and don’t lose it. The password doesn’t have to be very strong because, I suppose, you would be using MySQL on your computer for learning/development and NOT production.
- The configuration wizard has received all the information it needs and is ready to create a MySQL server instance. Click “Execute” button


Ignore messages from the anti-virus program and answer in the affirmative when the Windows 7 UAC (User Account Control) asks whether you want to run MySQLInstanceConfig.exe file. Generally, the instance should be configured without any problem.
However, if the MySQL Instance Configuration Wizard becomes unresponsive (the window shows a ‘Not Responding’ message), launch the Task Manager either from the Control Panel or use the old Ctrl-Alt-Del key combination and kill the program. Now go to C:\MySQL\bin folder and double click on MySQLInstanceCOnfig.exe file to launch the wizard once again.
However, if the MySQL Instance Configuration Wizard becomes unresponsive (the window shows a ‘Not Responding’ message), launch the Task Manager either from the Control Panel or use the old Ctrl-Alt-Del key combination and kill the program. Now go to C:\MySQL\bin folder and double click on MySQLInstanceCOnfig.exe file to launch the wizard once again.
Checking the MySQL installation
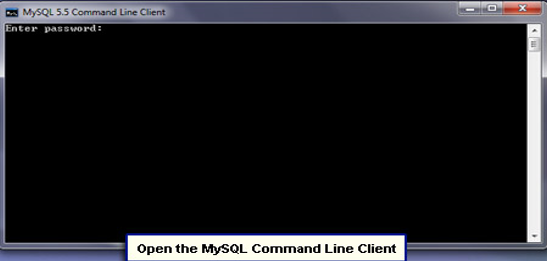
- The easiest way to check MySQL installation and confirm that it’s working properly is to use the MySQL Command Line Client. Fire it up from “All Programs” -> “MySQL” -> “MySQL Server 5.5“

- Now enter the MySQL password – the characters you type will be replaced by the asterisk sign (the password is not shown for security reasons – obviously)

- The MySQL client displays the mysql> prompt on successful login.
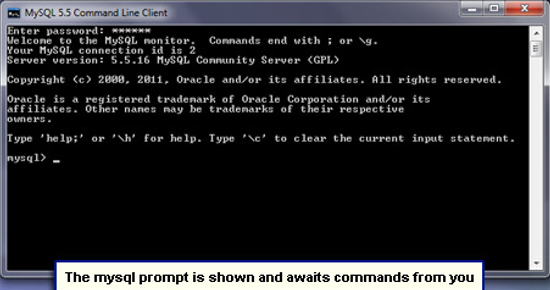
- Type show databases; (the semi-colon at the end is not a typo) and hit the enter key. This simple SQL command instructs MySQL to display the names of the installed databases and there should be four of these. Hurray! Rejoice because you have been able to correctly install MySQL on Windows 7.

Thanks for sharing your knowledge with us. Your blog keeps getting better and better! You have a lot creativity and originality now keep it up! Maybe someday my website will be the same like yours :)
ReplyDeleteWonderful information your website gives the best and the most interesting information. Great job you people are doing posting nice content.
ReplyDeletePlease Click Here For More Information About Any Course or Training Institute all over the world
https://www.calfre.com/USA/Texas/Houston/Oracle-HRMS-Training/listing
Oracle HRMS Training in Houston
Thank you for your guide to with upgrade information about Tableau
ReplyDeleteTableau Online Training
Nice Post!!
ReplyDeletePlease Look Here At - A healthy database is essential for your business's performance, uptime, and security. At RalanTech, we specialize in delivering comprehensive MySQL Database Health Check Service across the USA. Whether you're a startup or a large enterprise, our service ensures your MySQL infrastructure runs at peak efficiency.