
- Create scenario
- Create load plans
- Create Agent
- Run the load plan through command line
- Create a scenario
Now to create a ODI scenario first locate the folder where the interface or package you would want to convert into a ODI scenario.
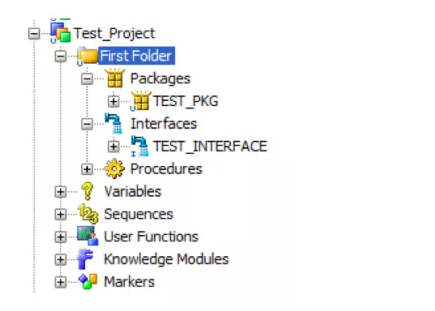
Once you have located the folder, highlight the folder and right mouse click. You will see a few options.
Locate the “Generate All Scenarios” and click the following option.

A popup will appear in which you will be asked to select a few options.Replace, Re-generate, and Creation
o Here you can either replace an existing scenario, re-generate a scenario due to updates and changes or create a new scenario.
- Object to Generate
o Here you have options on what ODI components in which you would want to convert to a ODI scenario.
- Marker Filter
- You can add the following scenario into a group and add a marker.
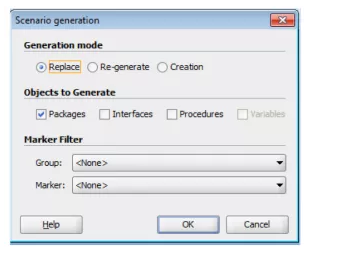
For our example you will select “Creation” for your generation mode and select “Packages” for objects to generate.
For the marker filter options you will leave this as “None.”
Once you have selected the following options, click “OK.”
Your scenario should be generating.
If do have a ODI variable within your package, the scenario variables option will pop up asking you the startup parameter.
Leave the following checked and click “Ok.”

You should not have received a pop up letting you know your scenario has been created.

In addition, you can validate your scenario has been created by going to the “Load Plans and Scenarios” tab and find your scenario.
Please note: You can also execute your scenario similar to a ODI interface or package.

Step 2: Create a load plan
Go to Load Plans and Scenarios navigator in designer-> new load plan as follow below screen short

Enter any name here TestLoadPlan1 given

Then goto steps
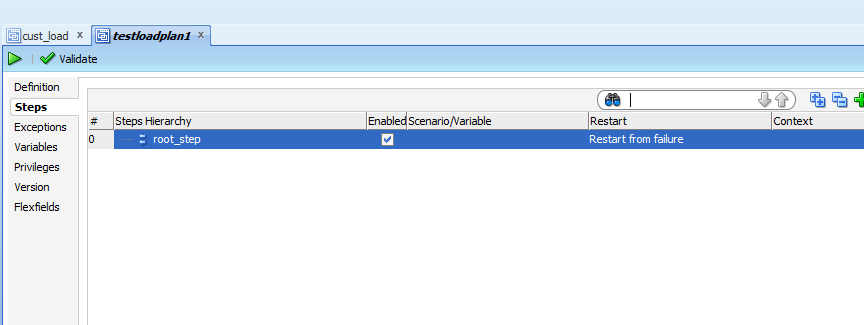
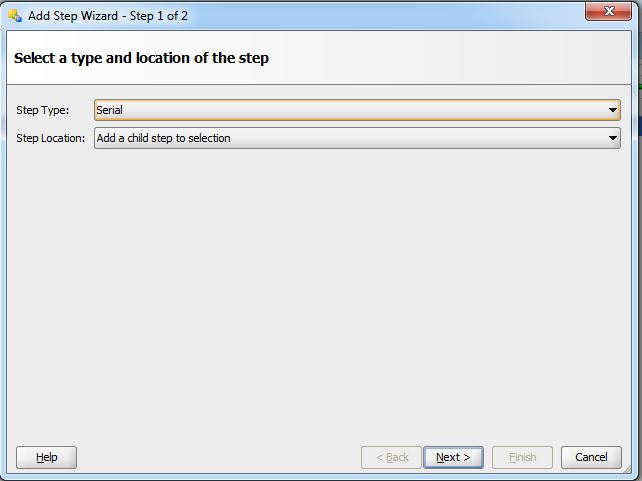
Right click on root_step and select add step
And select the step serial or parallel
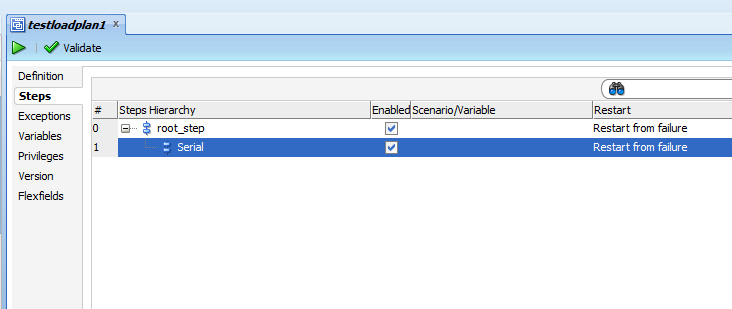
Right click on serial step and select add step and select run scenario
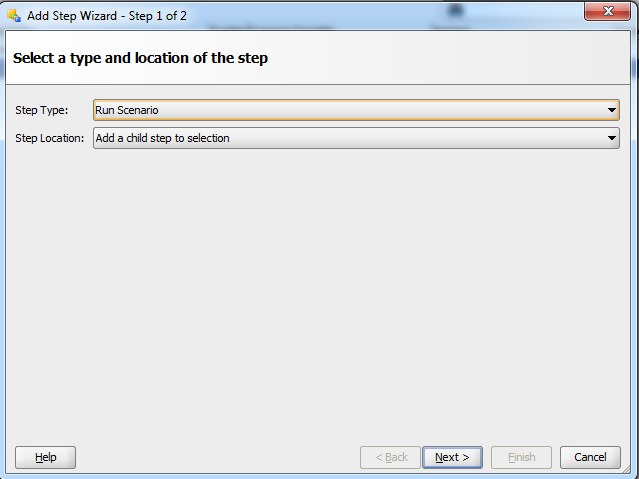
Click Next
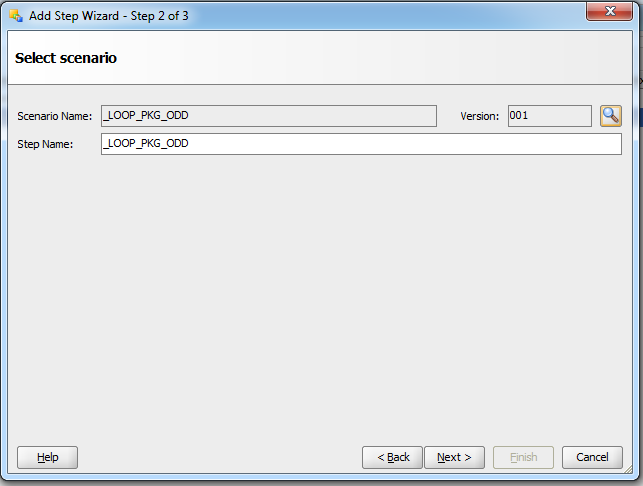
for select the scenario, click on brow  button
button
And click finish.

- Create agents:
3.1 Modify the odiparams.bat
3.2 Create agent at topology
Encode ODI Agent Password
Before creating an ODI agent, you must run the encode password command to generate an encrypted password and paste it into the odiparams.bat parameter file. To do so, perform the following steps:
3.1.1
|
Navigate to the ODI_HOME directory, where ODI is installed and open the agent\bin sub-directory: ( C:\Oracle\Middleware\Oracle_ODI1\oracledi\agent\bin). Navigate to the odiparams.bat file, right-click this file and select Edit to open it with a text editor. Leave this editor open; you will run a batch file from a Command window and return to this text editor to copy the results into the odiparams.bat file.
Explanation: You need to edit the odiparams.bat file to set the repository connection information for the ODI Agent to use. The password information is stored as an encrypted string. You will generate the encrypted string in a Command window.
 | ||||||||||||||||||||
3.1.2
|
Leave the text editor open, and open the Command window (Start -> Run -> cmd) and change the directory to the ODI_HOME\agent\bin directory:
C:\Oracle\Middleware\Oracle_ODI1\oracledi\agent\bin
 | ||||||||||||||||||||
3.1.3.
|
To generate the encrypted password string, you will be using the agent command: encode <password>. Because your password is the word “ oracle1”, enter and execute the following command in the Command window:
encode oracle1
Keep the Command window open, as you will be returning to it after editing the odiparams.bat file.
 | ||||||||||||||||||||
3.1.4
|
Copy the generated encrypted password from the Command window (from the Command window’s pull-down menu, select Edit > Mark, then highlight the password with your mouse) and insert it into the odiparams.bat file as the value for the ODI_MASTER_ENCODED_PASS parameter. Verify and, if necessary, edit settings for otherparameters from the table below, save the odiparams.batfile, and then close it. The agent’s connectivity is now set up.
Notes:
User snpm1 is RDBMS schema/user (Oracle 11g) for Master repository. It was created for this and subsequent OBEs in OBE "Creating and Connecting to ODI Master and Work Repositories".
Work Repository name is WORKREP.
Because each time when you encode the password, it gets different values, your encoded password will differ from the one provided in the screenshot.
Do not change the default value of the ODI_USER and ODI_ENCODED_PASS parameters. Those parameters were pre-coded during ODI installation.
Now that you have generated an encoded password and pasted it into the odiparams.bat file
 |
- Create the ODI Physical and Logical Agents
you need to create the ODI physical and logical agent definitions.
4.1.1
|
If not started, start Oracle Data Integrator: Start > Programs > Oracle > Oracle dat Integrator > ODI Studio. Click “Connect To Repository”. Select WORKREP1 from the LoginName drop-down list. For Password, enter: SUNOPSIS. Click OK.
   |
4.1.2.
|
Click Topology tab. In Topology, select the Physical Architecture panel. Right-click the Agents node. Select New Agent.
 |
4.1.3
|
Fill in the following fields:
Click Save button.
 |
4.1.4
|
Now you have to insert a logical agent in Logical Architecture, and map it to the newly created Physical agent. Click the LogicalArchitecturetab. Right-clickAgents and select New LogicalAgent. On the screen that follows, set the Name to “localagent.” Set Physical Agents to localagent . From file menu click Save, and then close the Logical Agent tab.
   |
- Starting ODI Agent from the Command Line and Testing Connection
Now that you have created the agent and defined the ODI physical and logical agents, you can start the agent directly from the command line. You also test connection to your ODI standalone agent.
5.1.1.
|
Switch back to the Command window you left open at the ODI_HOME\agent\bin directory ( C:\Oracle\Middleware\Oracle_ODI1\oracledi\agent\bin). Execute the agent.bat file using the following command:
agent -NAME=localagent

The agent is now starting. Verify that ODI Agent is successfully started. Minimize the window Command Prompt – agent-NAME=localagent.
Note : This command window should remain open during all labs.
 |
5.1.2.
|
In ODI, click Test icon to verify connection of the ODI agent localagent. Click OK.
You successfully created and connected to ODI agent.
|
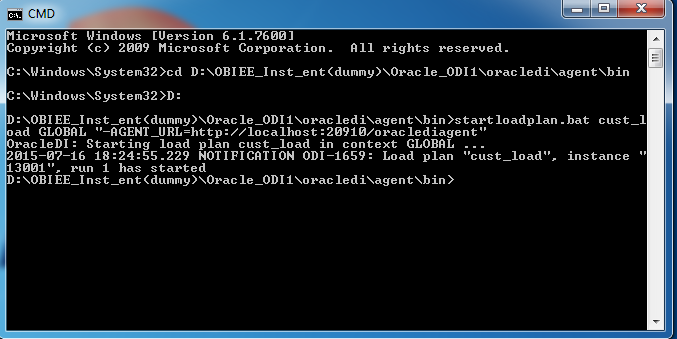
5.1..3 run the load plans in command prompt:
To start a Load Plan from a command line:
- Change directory to /agent/bin directory of the Oracle Data Integrator installation.
- Enter the following command to start a Load Plan.
On WINDOWS systems:
startloadplan.bat <load_plan_name> <context_code> [log_level]"-AGENT_URL=<agent_url>" ["-KEYWORDS=<keywords>"] ["<variable>=<value>"]*
Example:
startloadplan.bat Testloadplan1 GLOBAL "-AGENT_URL=http://localhost:20910/oraclediagent"
Then goto Operator and check the status.
It was really a nice post and I was really impressed by reading this
ReplyDeleteTableau Online Course
will it work on linux machine?
ReplyDeleteodi12c
is it possible to execute the loadplan without password through command line
ReplyDeleteThis concept is a good way to enhance the knowledge.thanks for sharing..
ReplyDeleteODI Online Training
ODI Training
ODI support
Nice explanation
ReplyDeleteHow to call .executable files in ODI Environment?
ReplyDeleteHi
ReplyDeleteCan you please explain with example about restartloadplan.sh. What are the mandatory parameters and how can I find out the ODI Agent URL of a stand alone ODI agent.
Regards
Rohit